
In the world of website development and management, WordPress remains a dominant force. It offers a versatile platform for individuals and businesses to showcase their ideas, products, and services to a global audience. However, like any other technology, WordPress requires proper optimization to ensure optimal performance.
One critical aspect of WordPress optimization is managing the memory limit. The memory limit determines how much RAM WordPress can use to execute tasks and run plugins and themes efficiently. In this comprehensive guide, we will explore every way to adjust the WP memory limit and unleash the true potential of your WordPress website.
Every Way to Adjust WP Memory Limit: Explained
What is the WP Memory Limit?
Before delving into the various methods of adjusting the WP memory limit, let’s first understand what it actually means. The WP memory limit refers to the maximum amount of memory allocated to PHP, the scripting language powering WordPress.
By default, WordPress sets a conservative memory limit to ensure compatibility with a wide range of hosting environments. However, depending on the complexity of your website, you might need to increase the memory limit to avoid performance bottlenecks.
Checking the Current WP Memory Limit
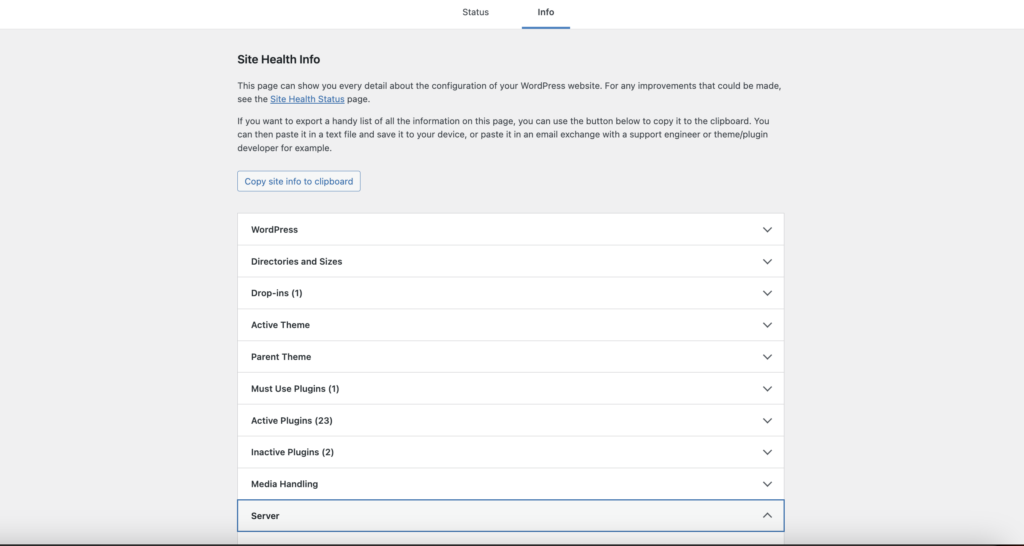
In your WordPress dashboard, head to Tools > Site Health. Expand the Server section and look for PHP memory limit. This value is what WordPress has available via PHP.
Now scroll down to the WordPress Consonants section and expand that, looking for WP_MAX_MEMORY_LIMIT, this value is what WordPress actually has to use.
You can also create a PHP file on your server with the following contents:
<?php
phpinfo( );
?>
Save the file and access it via the browser, looking for “memory”.
Delete the file when done, this information should not be shared.
What is “Allowed memory size of bytes exhausted” in WordPress?
In WordPress, the error message “Allowed memory size of bytes exhausted” is a common issue that users may encounter. It indicates that the memory limit allocated to PHP has been exceeded, preventing the execution of certain tasks or processes within WordPress.
When WordPress runs various operations, such as loading plugins, and themes, or processing large amounts of data, it requires memory (RAM) to handle these tasks efficiently. The memory limit defines the maximum amount of memory that WordPress can utilize for these operations. If the limit is reached or exceeded, the “Allowed memory size of bytes exhausted” error occurs.
This error message is typically accompanied by details that specify the current memory limit and the specific PHP file or function that triggered the error. It helps in identifying the source of the problem and determining the necessary steps to resolve it.
It’s important to address this issue promptly, as exceeding the memory limit can lead to degraded performance, slow page load times, and even site crashes. Fortunately, there are several ways to tackle this problem and adjust the WP memory limit, as discussed in the previous sections of this article.
By increasing the memory limit, you allow WordPress to allocate more memory for executing its tasks, thereby minimizing the occurrence of the “Allowed memory size of bytes exhausted” error.
What Causes the “Allowed memory size of bytes exhausted” Error in WordPress?
The “Allowed memory size of bytes exhausted” error in WordPress occurs when the memory limit allocated to PHP is exceeded during the execution of a task or process. Several factors can contribute to this error:
Insufficient Memory Allocation: By default, WordPress sets a conservative memory limit to ensure compatibility across different hosting environments. If your website has complex functionalities, resource-intensive themes, or a large number of active plugins, the default memory limit may not be sufficient, leading to the error.
Heavy Resource Consumption: Certain plugins or themes might consume a significant amount of memory while executing tasks. For example, image manipulation, data processing, or complex calculations can consume more memory than anticipated, causing the memory limit to be exhausted.
Recursive Functions or Infinite Loops: Recursive functions or infinite loops that keep executing without termination can rapidly consume memory until the limit is reached. This can occur due to coding errors, plugin conflicts, or poorly optimized custom code.
Large Data Sets: Handling large data sets, such as importing or exporting large files, can require substantial memory resources. If the allocated memory limit is insufficient to process such data, an error can occur.
Inefficient Code or Memory Leaks: Poorly optimized or inefficient code can consume more memory than necessary. Memory leaks, which occur when allocated memory is not released after use, can gradually deplete the available memory, leading to the error over time.
Shared Hosting Limitations: In shared hosting environments, the hosting provider may impose memory limits to ensure fair resource distribution among multiple websites hosted on the same server. If the allocated memory limit is too low, it can trigger the error even with moderately resource-intensive WordPress installations.
To address the “Allowed memory size of bytes exhausted” error, you can adjust the WP memory limit as discussed in this article. Increasing the memory limit allows WordPress to allocate more memory for its operations and helps prevent errors from occurring.
However, it’s essential to identify the root cause of the issue. Review your website’s plugins, themes, custom code, and resource-intensive processes to optimize memory usage. Consider utilizing caching mechanisms, optimizing database queries, and ensuring efficient code practices to minimize memory consumption.
Related: How to Troubleshoot Memory-Exhausted Error in WordPress
What is the Recommended PHP Memory Limit in WordPress?
The recommended PHP memory limit for WordPress depends on various factors such as the complexity of your website, the number of active plugins and themes, and the amount of traffic it receives. While there is no one-size-fits-all answer, there are general guidelines you can follow.
By default, WordPress sets a conservative memory limit to ensure compatibility with different hosting environments. The default limit is often around 64 megabytes (MB). However, for many websites, this limit may not be sufficient, especially if you have a large number of plugins or resource-intensive themes.
As a starting point, it is commonly recommended to set the memory limit to at least 128 megabytes (MB). This increased limit allows WordPress to handle more demanding tasks and ensures smoother performance. Many popular plugins and themes also recommend a memory limit of 128 MB or higher.
Every Way to Adjust WP Memory Limit: Methods and Techniques
Things to Keep in Mind
As we discussed in the “Checking the Current WP Memory Limit” section, PHP and WordPress have their own memory limit.
The WordPress limit cannot be higher than what PHP provides, in order to allocate more memory to WP, you’ll need to allocate more memory to PHP.
More is not always better. While some cases may require you to allocate more memory to your site, it should only be done when absolutely needed. Increasing memory should be seen as a troubleshooting technique, not a quick performance boost. Allocating more memory than required can have negative impacts.
Some plugins are memory hogs. Elementor requires 256 MB at minimum, 512 MB recommended, and 768 MB for best performance.
Modify PHP Configuration
Your server setup will determine how the PHP configuration needs to be adjusted.
PHP-FPM
- Back up your WordPress site.
- Locate the PHP-FPM Configuration File: The PHP-FPM configuration file is typically named
php-fpm.conforwww.confand is located in the PHP-FPM configuration directory. The exact location may vary depending on your server setup and operating system. Common locations for the configuration file are:/etc/php-fpm.conf/etc/php/7.x/fpm/php-fpm.conf/etc/php/7.x/fpm/pool.d/www.conf
- Open the Configuration File: Use a text editor to open the PHP-FPM configuration file. You might need root or superuser privileges to modify the file.
- Find the
php_admin_value[memory_limit]Directive: Search for the line that starts withphp_admin_value[memory_limit]. This directive specifies the memory limit for PHP-FPM processes. - Increase the Memory Limit: Modify the value assigned to
php_admin_value[memory_limit]increase the memory limit. The value is specified in megabytes (MB). For example, to set the memory limit to 256 megabytes (MB), change the line to:php_admin_value[memory_limit] = 256MAdjust the value based on your requirements. Be mindful not to set an excessively high limit that may strain server resources. - Save the Configuration File: Save the changes you made to the PHP-FPM configuration file.
- Restart PHP-FPM Service: To apply the new memory limit, you need to restart the PHP-FPM service. The command to restart the service depends on your operating system. Common commands to restart PHP-FPM are:
- Ubuntu or Debian:
sudo service php7.x-fpm restart(replace7.xwith your PHP version)CentOS or Fedora:sudo systemctl restart php-fpm
- Ubuntu or Debian:
After following these steps, PHP-FPM will use the updated memory limit for processing PHP scripts. Keep in mind that modifying the PHP-FPM memory limit affects all PHP processes managed by PHP-FPM.
PHP.ini
If you have access to the server’s PHP configuration file (php.ini), you can adjust the memory limit directly from there. Here’s how:
- Back up your WordPress site.
- Connect to your server using SFTP or a file manager.
- Locate the
php.inifile. It is usually found in the root directory or in theetcfolder. - Open the
php.inifile in a text editor. - Look for the line that says
memory_limit = 64Mand modify it to your desired value, such asmemory_limit = 128M. - Save the file and upload it back to the server.
Note that not all hosting providers allow access to the php.ini file. If you don’t have direct access, you may need to contact your hosting provider or explore alternative methods.
Editing .htaccess File
Another method to adjust the WP memory limit involves modifying the .htaccess file on Apache servers, which controls server configurations. Here’s what you need to do:
- Back up your WordPress site.
- Connect to your server using SFTP or a file manager.
- Locate the
.htaccessfile in the root directory. - Open the file in a text editor.
- Add the following line at the end of the file:
php_value memory_limit 128M- Save the file and upload it back to the server.
This method allows you to override the default memory limit settings for PHP specifically on your WordPress site.
Editing the wp-config.php File
One of the simplest ways to adjust the WP memory limit is by modifying the wp-config.php file. Follow these steps:
- Back up your WordPress site.
- Access your WordPress installation using SFTP or a file manager provided by your hosting provider.
- Locate the
wp-config.phpfile in the root directory. - Open the file in a text editor.
- Add the following line just before the line that says
/* That's all, stop editing! Happy blogging. */:
define('WP_MEMORY_LIMIT', '128M');- Save the file and upload it back to the server, overwriting the existing file.
By setting the value to '128M', you are increasing the WP memory limit to 128 megabytes. Remember to choose an appropriate value based on your website’s requirements.
Using a Plugin (last resort)
At the time of writing, no plugins from WordPress.org which are designed to increase the memory limit are working.
If you are being blocked by not having SFTP access, you could temporarily edit the wp-config.php file with WP File Manager if your web host cannot help you out.
- Back up your WordPress site.
- In your WordPress Dashboard, head to Plugins > Add New.
- Search for “file manager” or download it from WordPress.org.
- Once installed and activated, scroll to the bottom left menu of WordPress and click File Manager.
- Locate
wp-config.phpand right light > Code Editor. - Add the following line just before the line that says
/* That's all, stop editing! Happy blogging. */:define('WP_MEMORY_LIMIT', '128M'); - Click Save.

Be sure to add the line exactly where instructed and be sure not to add any extra characters. If not done correctly, you won’t be able to use the WP File Manager plugin to correct it, meaning your site will be broken until you restore the backup or find another way to access the file.
Using cPanel
To increase the PHP memory limit in cPanel, you can utilize the PHP Configuration section provided in the cPanel interface. Follow these steps:
- Log in to cPanel: Enter your cPanel URL in your web browser and log in using your cPanel username and password.
- Locate the “Select PHP Version” Option: In the cPanel dashboard, look for the “Select PHP Version” or “MultiPHP Manager” option. The exact location may vary based on the theme or layout of your cPanel interface.
- Access PHP Configuration: Once you locate the “Select PHP Version” or “MultiPHP Manager” option, click on it to access the PHP configuration settings.
- Choose the Appropriate PHP Version: Select the PHP version that your website is using. You can usually find the current PHP version on the right side of the screen.
- Adjust the Memory Limit: After selecting the PHP version, you will see a list of available PHP settings. Look for the “memory_limit” option and click on it to modify the value.
- Set a New Memory Limit: In the “memory_limit” field, enter a new value for the PHP memory limit. You can specify the value in megabytes (MB). For example, if you want to set the memory limit to 256 megabytes, enter “256M”.
- Save the Configuration: Once you have entered the desired memory limit, click on the “Apply” or “Save” button to save the changes.
After saving the new memory limit, PHP will use the updated value for your website’s PHP scripts. This increase in memory limit can help prevent memory-related errors and ensure that your website functions smoothly.
Consult Host’s Knowledgebase
If you use a popular web host, simply Google “hostname increase memory limit”. This should help learn any memory policy and perhaps provide instructions to increase it.
| Host | Max | Increasable? |
|---|---|---|
| Kinsta | 256 MB | On some plans, contact support. |
| Siteground | 768 MB | Some plans. |
| WP Engine | 512 MB | Possibly on some plans. |
| Hostinger | 512 MB | Yes, on some plans. |
| Dreamhost | 256 MB | Yes. |
| Bluehost | 256 MB | Yes. |
| HostGator | 256 MB | Only on VPS/dedicated. |
| GoDaddy | 512 MB | Yes, on some plans. |
| Namecheap | 512 MB | Unknown. |
| Nexcess | 2048 MB | Unknown. |
| Hostwinds | 256 MB | No. |
| A2 Hosting | 256 MB | No. |
Contacting Your Hosting Provider
If all else fails or you are unsure about adjusting the WP memory limit yourself, it’s always a good idea to contact your hosting provider for assistance. Many hosting companies have support teams readily available to help with technical issues, including memory limit adjustments.
FAQs About Adjusting WP Memory Limit
How do I know if my WordPress site requires a memory limit adjustment?
If you encounter frequent performance issues, such as slow page load times or error messages related to memory exhaustion, it might be an indicator that you need to increase the memory limit. Additionally, certain plugins or themes might explicitly recommend higher memory limits for optimal functionality.
Can I set an unlimited memory limit for my WordPress site?
While it may be technically possible to set an unlimited memory limit, it is not recommended. Allocating an excessive amount of memory can strain your server’s resources and lead to performance issues. It is best to set a reasonable memory limit based on your website’s requirements.
What is the ideal memory limit for a typical WordPress site?
There is no one-size-fits-all answer to this question as the ideal memory limit depends on various factors, including the complexity of your site, the number of active plugins, and the amount of traffic it receives. However, most websites can function well with a memory limit of 128 megabytes or higher.
Will increasing the memory limit affect the performance of other websites on the same server?
No, adjusting the memory limit for your WordPress site only affects the resources allocated to your specific installation. Other websites on the same server will have their own memory limits and independent resource allocations.
Does memory limit adjustments require advanced technical knowledge?
While some methods, such as editing files wp-config.php or php.ini, may require basic technical understanding, using plugins offers a more straightforward approach suitable for users of all technical levels. Contacting your hosting provider’s support team is also an accessible option for users who prefer expert assistance.
Conclusion
Optimizing the WP memory limit is crucial for maintaining a high-performing WordPress website. By following the methods and techniques outlined in this guide, you can ensure your site has sufficient memory resources to handle its tasks effectively. Remember to choose an appropriate memory limit based on your website’s requirements and consult with your hosting provider if needed.
So, take control of your WordPress website’s performance today by adjusting the WP memory limit using the methods discussed in this article. Maximize your site’s potential and provide visitors with a seamless browsing experience.